AWS Redshift Guide
Learn more about the benefits of Satori for AWS Redshift and Schedule a demo meeting

It only takes a few minutes to get started with Satori. What you need is:
- Access to Satori's management console.
- The hostname of your Redshift cluster, for example:
abc123.ci3gimsawmqt.us-east-2.redshift.amazonaws.comor, the hostname of your Redshift Serverless Endpoint, for example:abc123.12534567890.us-east-1.redshift-serverless.amazonaws.com
Learn more about the benefits of Satori for AWS Redshift and Schedule a demo meeting
Adding an AWS Redshift Data Store to Satori
- Login to the Satori's management console at https://app.satoricyber.com.
- In the Data Stores view, select Add Data Store.
- Select the Redshift option.
- Enter an informative name for the data store, for example: Sales Data Warehouse.
- Enter the hostname of your Redshift cluster, for example:
abc123.ci3gimsawmqt.us-east-2.redshift.amazonaws.com. You can find the hostname of your Redshift cluster in the AWS console. - Satori will automatically choose the correct region.
- Click Create.
- You will be redirected to the Data Stores list.
Connect to AWS Redshift via Satori
To connect to Redshift using Satori use the Satori hostname that was generated by the management console which can be found under Satori Hostname in the data store settings view, for example: abc123.ci3gimsawmqt.us-east-2.a.p0.satoricyber.net.
TLS SNI Required
To connect to Redshift via Satori, the client application needs to support the Server Name Identification (SNI) extension of the Transport Level Security (TLS) protocol. For clients that do not support the SNI extension, Satori can enable a custom, dedicated port which overcomes the problem. The custom port number can be found in the data store setting in the management console.
Please contact Support for more details.
Connecting with the JDBC Driver
To connect with the JDBC driver, override or add the host parameter in the JDBC URL. For example:
jdbc:redshift://abc123.ci3gimsawmqt.us-east-2.a.p0.satoricyber.net/?user=john@example.com&...
Connecting with the JDBC Driver and AWS IAM
When using Amazon Identity and Access Management (IAM) to authenticate to Redshift, ensure that the ClusterID and Region properties are set. For example, when connecting to abc123.ci3gimsawmqt.us-east-2.redshift.amazonaws.com set ClusterID to abc123 and Region to us-east-2.
Connecting with the PSQL Command Line Utility
TLS SNI not supported by PSQL Please use version 13.1 or higher of PSQL. In prior versions, PSQL uses the TLS1.0 protocol by default which is considered insecure and is not supported by Satori.
To connect to Redshift using PSQL change the host parameter to the Satori generated hostname and use the custom dedicated port for your data store. For example:
psql -h abc123.ci3gimsawmqt.us-east-2.a.p0.satoricyber.net -p 12340 -U john example
Connecting with the Python Connector
TLS SNI not supported by redshift-connector Please use version 2.0.93 or higher of the redshift-connector for python.
To connect to Redshift using PSQL change the host parameter to the Satori generated hostname and use the custom dedicated port for your data store. For example:
conn = redshift_connector.connect(
    host='abc123.ci3gimsawmqt.us-east-2.a.p0.satoricyber.net',
    port=12340,
    ...
)
Connecting with Tableau
TLS SNI not supported by Tableau
To connect to Redshift using AWS QuickSight override the Server and Port fields in the data source settings with the Satori hostname and custom dedicated port for your data store.
As an alternative, Tableau can also use the JDBC driver to connect to Redshift which does support the TLS SNI extension.
Connecting with Looker
Looker uses the JDBC driver to connect to Redshift. Override the Remote Host:Port parameter with the Satori hostname. For example: abc123.ci3gimsawmqt.us-east-2.a.p0.satoricyber.net:5439.
Connecting with AWS QuickSight
TLS SNI not supported by AWS QuickSight
To connect to Redshift using AWS QuickSight override the Database server and Port fields in the data source settings with the Satori hostname and custom dedicated port for your data store.
Connecting with QlikSense
TLS SNI not supported by QlikSense
To connect to Redshift using QlikSense override the Host name and Port fields in the data source settings with the Satori hostname and custom dedicated port for your data store.
Connecting with dbt
dbt uses the Redshift Python SQL connector to connect to Redshift. When you configure your profile, make sure you use your Satori hostname, and set sslmode to `require
Network Policy Settings
Satori provides you with the ability to define your network security policy for your data store.
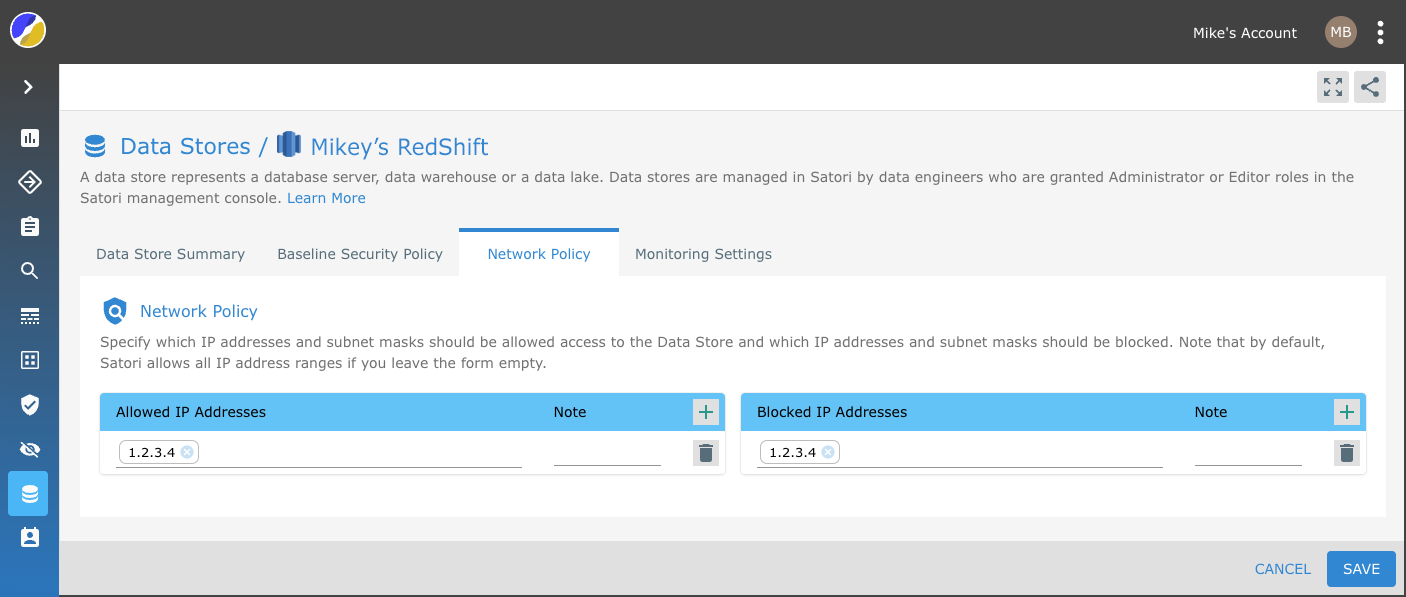
Simply, specify which IP addresses and subnet masks should be allowed access to the Data Store and which IP addresses and subnet masks should be blocked. Note that by default, Satori allows all IP address ranges if you leave the form empty.
Example 1
To allow all IP addresses - Leave the form empty.

Example 2
To block specific IP addresses - Add them to the blocked IP address list.

Example 3
To only allow access to specific IP addresses - Add them to the allow list. Note: Access from all other IP addresses ware blocked.

Example 4
To allow access from a specific IP address range while blocking parts of the range - Add the IP range to the list of allowed IP addresses and add the IP address that you wish to block to the Block list.
